GZIP is a file format and free software utility that enables compression on webpages to increase its speed and save bandwidth. Its very important to have faster webpage as loading has a big impact on SEO and if your site is slow then you can have heavy bounce rate as person will tend to leave your site before its fully loaded as its taking a lot of time.

Well compressing your site with GZIP will help you in overcoming this problem and making your webpage lightning speed. We have posted some tips and tricks to increase your blogger blogs loading time, check that out maybe that could be a big relief to you.
Check if GZIP Compression is Enabled on your Blog or Not
First thing to start compressing your blog is to check if you are already using the GZIP compression, as many blog templates already come configured with GZIP so checking the status could be helpful. Now checking status is quiet easy as we have many tools these days that could do the trick, we will be using checkgzipcompression.com for checking the status of any page.
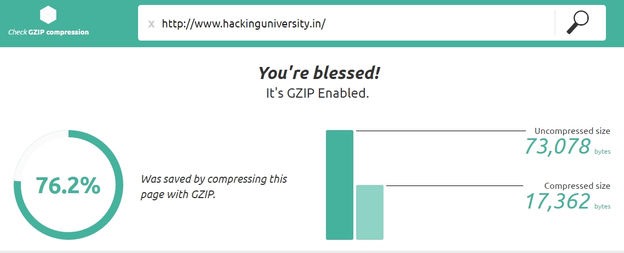
As you can see I tested my own website and by luck I was already using the GZIP compression and hence it saved a lot of size, check the uncompressed size which is 73,078 bytes and when it was compressed it became 17,364 bytes a 76.2% savings which is alot.
How to Enable GZIP Compression on Blogger Blogs
Well you are in luck as Google as automatically optimized all the blogger blogs, so you do not have to do any hardwork and your blog pages are automatically compressed and optimized. To check the status navigate to above website and enter your domain URL, now it will show you all the savings you have done using the GZIP Compression feature.
How to Enable GZIP Compression in WordPress Blogs
But yes if you are on WordPress then you need to install a plugin manually off course, that's why I love Blogger :p, okz so on WordPress we have a very popular plugin called “W3 Total Cache” which is a GOD’s Gift for WordPress users, truly a magnificent plugin.
How to Install W3 Total Cache Plugin in WordPress
Installing and activating W3 Total Cache plugin in wordpress is a breeze, so just follow below steps to see how its done.
Install W3 Total Cache Plugin in your wordpress blog.
- So after you have installed the W3 Total Cache Plugin in your wordpress blog you will another tab called “Performance” under Settings.
- After you click the Performance tab you will access the General Settings Page of W3 Total Cache Plugin.
- So you will see many option’s just navigate to Performance > Browser Cache option.
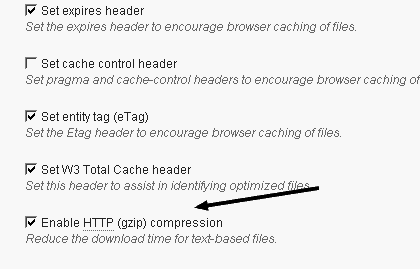
- Now you can check all the options whichever you wanna select, the last option you will see is Enable HTTP (gzip) compression.
- This is the option you need to select and everything rest will be done automatically.
So guys now your wordpress blog will be compressed using the GZIP Compression technology. Your webpages will be served fast and bandwidth will be saved automatically. This will help you to lower your bounce rate and even increase your load time SEO, have fun and do like and share this post.